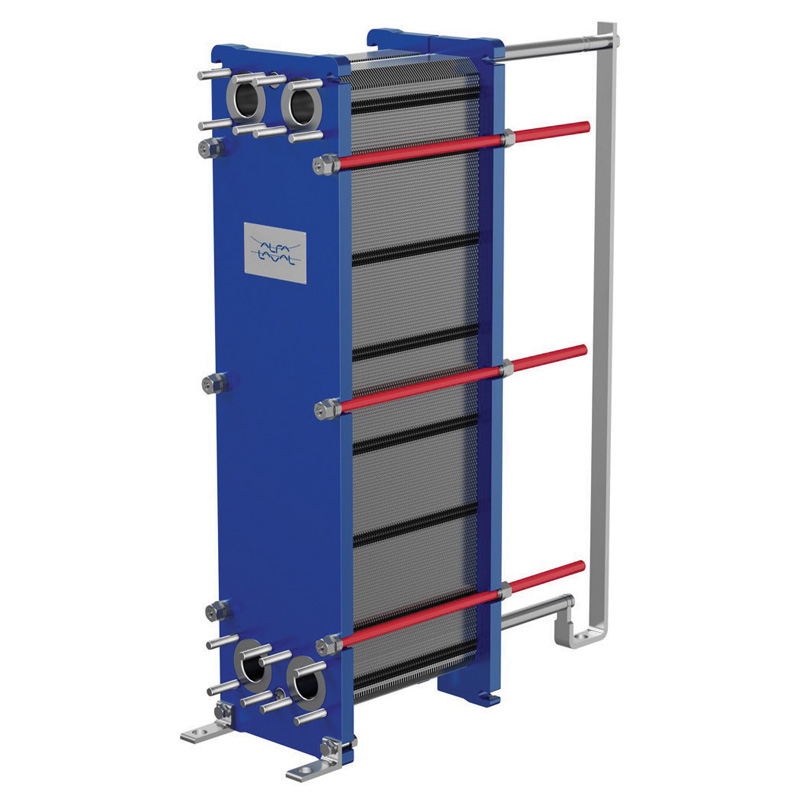
You may wish to open your existing unit for a number of reasons: an inspection due to lack of performance, to add or remove heat transfer plates, to address any leaks noticed coming from the sides or bottom of the unit, etc. It may seem like an involved and confusing process, but with a little guidance it is easily and quickly done. Using the proper method to open and close the unit may prevent issues that caused the unit to be inspected in the first place.
If you are noticing leaks from the unit, you can confirm that the unit was closed correctly without having to open the unit. Plate Heat Exchangers are closed until the plate pack reaches a certain dimension, not just when the bolts feel like they were closed tight enough. If the unit was left expanded more than it should have been, tightening it appropriately will likely stop any leaking issue. It is also important to make sure any tightening on the bolts is done evenly. This will prevent any bending damage caused to the plates by too much compression on one half of the plate.
Opening:
The amount of tightening bolts on your unit depends on the model you have. Generally, it is easiest to completely remove any bolts from the top and bottom (if there are any). From there, gradually loosen the remaining bolts while changing diagonally (and keeping all bolts relatively even) to the next. At a point, the plates will become loose and the pressure frame can slide to the back of the carrying bar (bars along the top and bottom that the plates connect into). Now that the unit is opened we can perform whatever task at hand we had. If you were changing the number of plates or re-arranging them, keep the following in mind:
In single-pass units there are 3 types of plates to look for. They are easily laid out in a correctly plated unit: the first plate, the last plate, and every plate in-between those. Make sure your first plate contains 4-ringed gaskets. This will prevent any flow from going between this plate and the front pressure plate (where no heat transfer happens). The last plate is easily identified as the only un-punched plate in the unit; it will not have 4 port holes in the corners. All the remaining will be channel plates. Assemble these in an alternating pattern, so that if the chevron (direction of pressing) is up on the first, it will be going down on the second, then up, etc. Repeat this pattern until the final plate is used (the final plate also follows this pattern).
Tips: wear gloves, keep track of your first and last plate, make sure all gaskets face the front, if a single bolt is too difficult move on to the others
Closing:Closing the unit is done in a similar method: gradually tighten each bolt while switching on the diagonal, and near the end put on the top/bottom bolts. Keep in mind if the plate count has been changed to adjust the tightening dimension accordingly. You can consult Virginia Heat Transfer for advice.